|
|

|
|
|
|
|
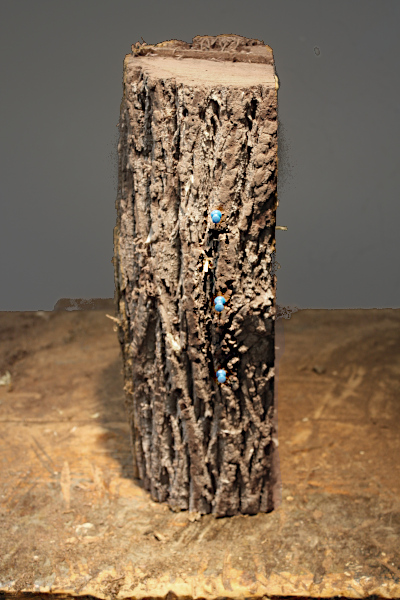
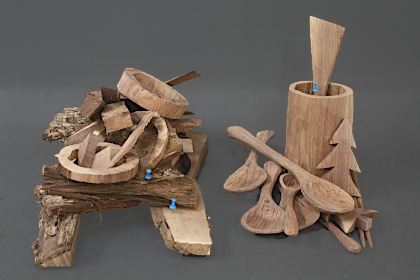
At the outset this appeared to be the least promising of the four sections, so I planned for mostly smaller items. The proverbial bump on a log to the right of the second pin was the first sign of potential trouble. But while this well-worn idiom directed at a person might imply that they are of no help or useless, the actual bump is useful to a woodworker. It's usually a sign of where the tree grew over the stump of a limb that was cut or broken off and will appear as a knot on the surface upon cutting or, if the limb has rotted, as a cavity. |
|
|
|

|
So, a bowl was ruled out from the start and while I could have cut the problem area out and designed a larger piece with what was left, I decided to play it safe and carve smaller items that could be worked around the problem area. I knew a crock would be in there somewhere and spoons fit in almost anywhere. Besides I wanted to create a sampler of the different items I carve from a log and I still had two more sections of the log to get larger pieces from. I first cut the blue section in half down the middle and cut the piece of wood for the crock from the upper part of the half sporting the bump. The crock was shaped and bored out with an electric chain saw in a process that will be detailed elsewhere. From the piece of wood below the bump, I cut some nice little boards that were suitable to make the bottom of the crock and some tree ornaments. |
|
|
|
|
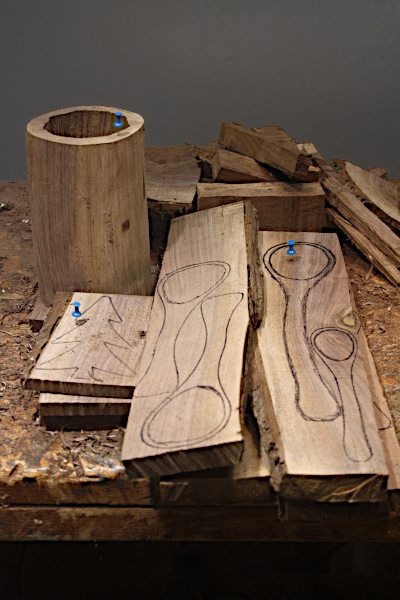
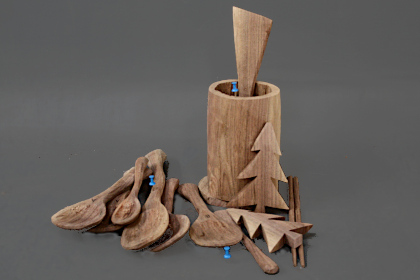
There was indeed the remnant of a broken off tree limb under the bump, but it did not pose nearly as much of a problem as these embedded pieces can. It tapered out quickly in the back half of the blue section, and I was able to cut out a number of nice treenware pieces, including two salad sets, three spoons, and a pair of chop sticks. The tail end of the embedded branch is evident as a knot just above the drawing of a small spoon in the above left photograph. Notice with the bend in the grain how the tree adjusted around it, and directly across from the knot, on the left edge of the board with the bark, is the telltale bump. This board also demonstrates how treenware can be scaled or shaped to fit anywhere. |
|
|
|
|
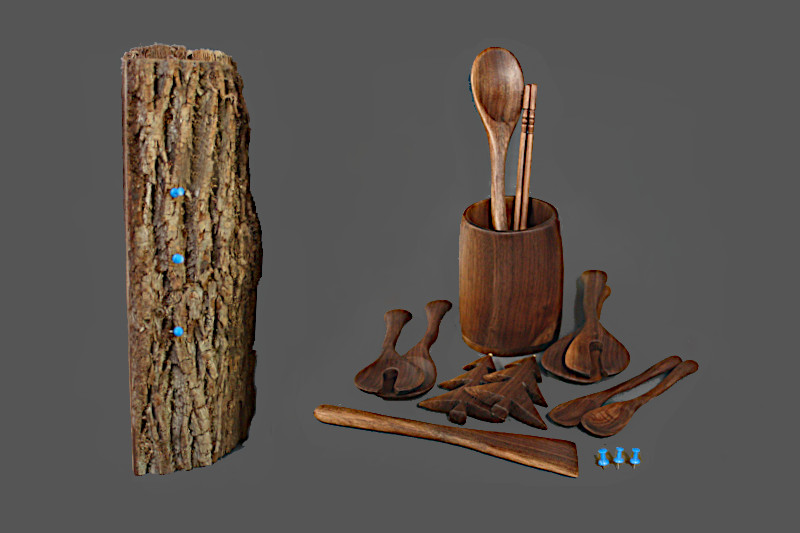
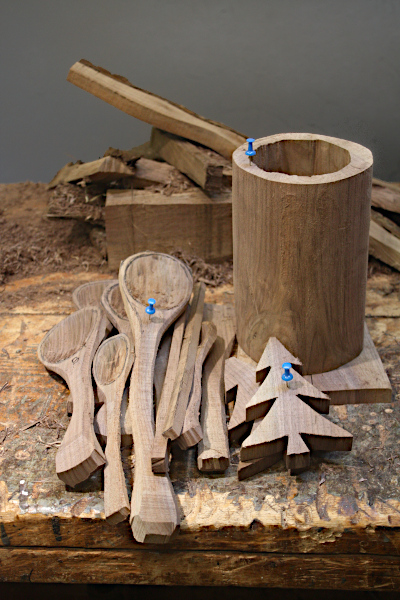
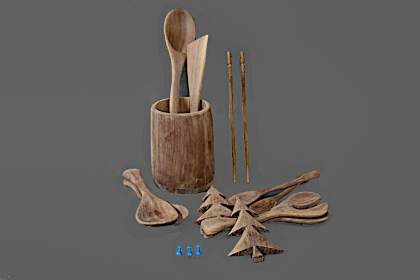
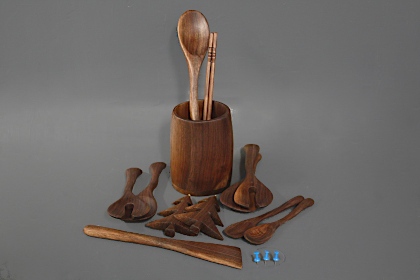
At the top left are pictured the ten carvings from the blue section along with the cut off pieces. If it seems that the crock has lost height, it has as evidenced by the three circular pieces in the cut off pile. I usually let the pieces for a crock dry for at least six months before I use them, but I thought that since this log was so dry to begin with, I might get away with skipping that. But no such luck, and after a few days, a crack formed at the bottom that required these three cut offs until I got ahead of it. At the bottom left the ten carvings from the blue section are pictured after the final sanding and beside them, the same pieces, following the finishing procedure I described elsewhere. I know if you're counting, it seems like there are thirteen carvings, but workshop ground rules state that in the case of a salad set or a pair of chopsticks, the two pieces count as one carving. And I'm always one to follow the rules. Nevertheless, I got ten nice carvings, when at the outset I considered this section of the log to be the least promising. |
|
|
|
|
|