|
|

|
|
|
|
|
The two bottom sections of the log were larger than the top two, and looked sound from all angles so I reserved them for larger pieces. Of the hundreds of pieces I've carved over the years, hawks and owls have been represented most often. The fact that they are a relatively simple shape to carve as well as popular subjects has been part of the reason, but for me they're also an enjoyable, low stress project that allows me to focus on the overall composition of the piece rather than just the subject. I'm so familiar with my interpretation of these two subjects that I rarely look at pictures, but simply draw a rough sketch on the piece of wood with a sharpie, start cutting, and wing it from there. |
|
|
|
|
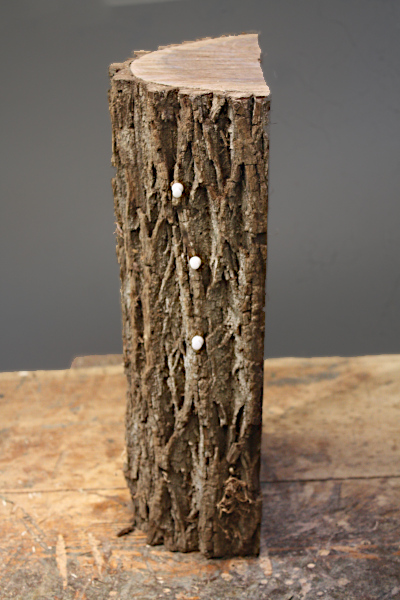
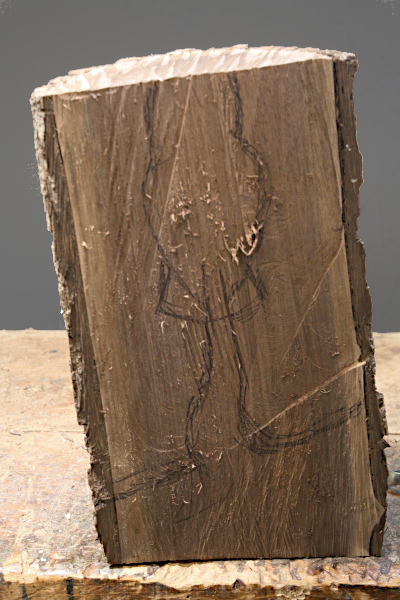
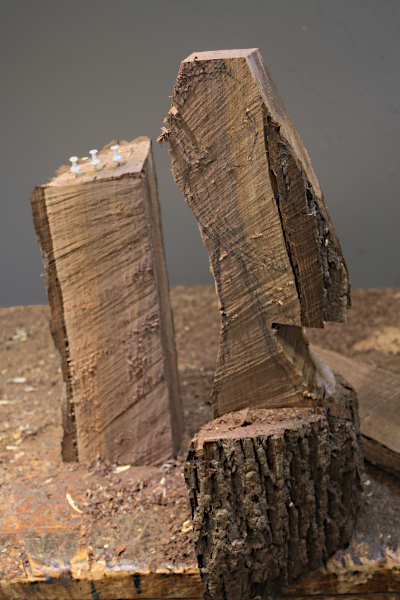
I picked the white section for an owl and decided to utilize the the whole piece of wood in the composition, including the bark. With the cut face forward, this section was slanted to the left, which gave me the idea to slant the area that would eventually form the base for the piece, the same way. The image of an owl and the stem it is perched on is a typical first drawing that I employ on every carving, even spoons. To hold a piece of wood this size in place while I work on it, I screw a 1/2 inch lag bolt with washer, fed through a hole in the bench top, into a 5/8 inch hole drilled in the botton of the wood to be carved. The bolt is tightened to lock the piece down so that it does not move no matter what tool is being used. |
|
|
|

|
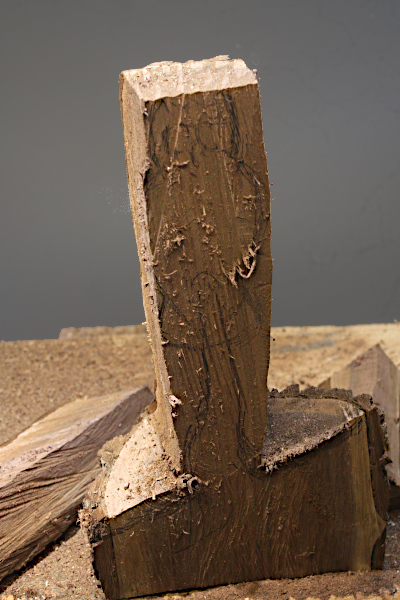
Blocking out is the phrase used to describe the removal of excess wood to establish the basic, rough shape and proportions of a woodcarving. With an electric chainsaw, I blocked out the piece from a frontal perspective and then turned it ninety degrees and did the same for the the side view. This resulted in a rough shape that already resembled an owl. From there, I rounded the corners off and proceeded to slowly removed wood from all sides to approach the final shape I wanted. |
|
|
|
|
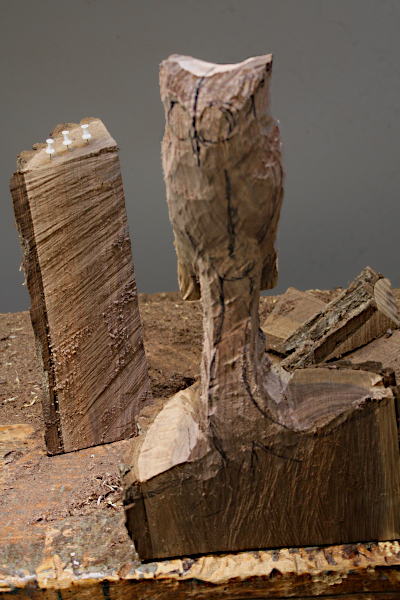
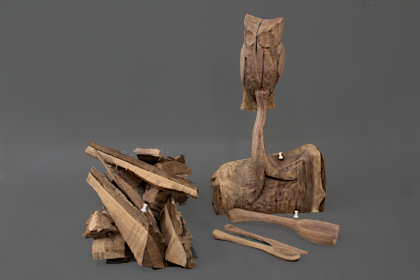
The blocking out also resulted in one nice piece of wood, cut from the right side of the bird and seen in the photos with three pins on top. I sawed it into several small boards, a thicker one, suitable for a scoop and two thinner ones from which came a small spoon and a spreader. As the piece progressed, I redrew and refined the original sketch and added additional guidelines as they were needed. The vertical lines down the face and breast of the owl served as a measure to keep the piece symmetrical as wood came off from both sides. And with this particular piece, because I decided to turn the head, these lines helped to ensure that I worked on each area separately and kept the head turned just the way I wanted it to be relative to the rest of the bird. |
|
|
|
|
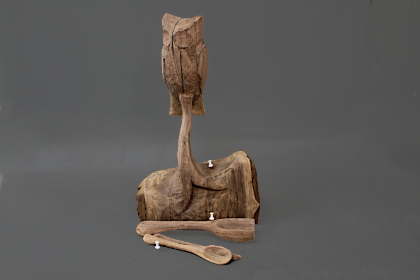
In the photos above, the utensils are cut out and shaped to catch up with the progress of the owl. Small items such as these are blocked out with a band saw and shaped on a belt sander. The owl needs to be refined a bit more and the stem needs to be narrowed way down. I left the stem lag behind in the overall progression for support until the heavy work on the owl was complete. If the stem was already thinned down, a slip with the chain saw while working up above could have spelled disaster |
|
|
|
|
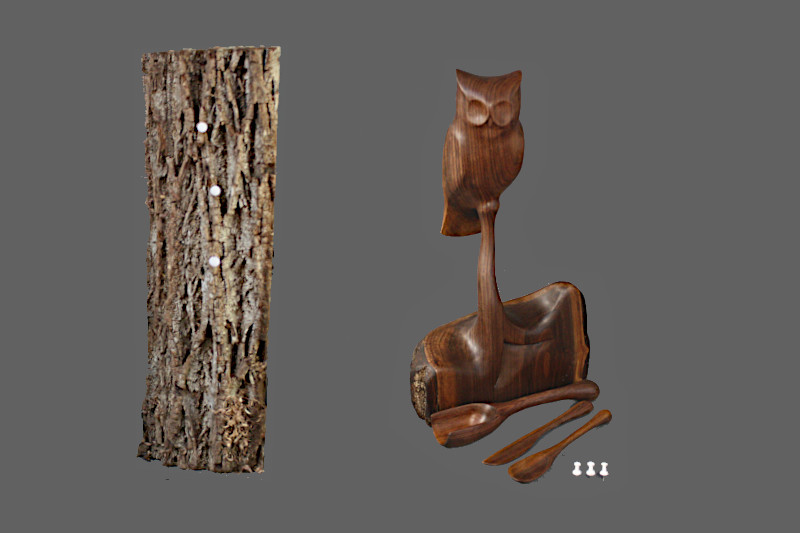
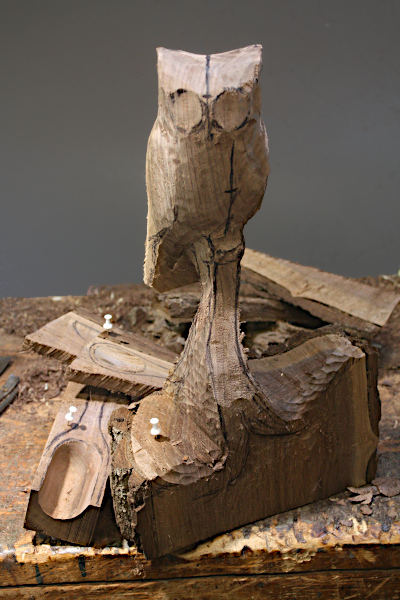
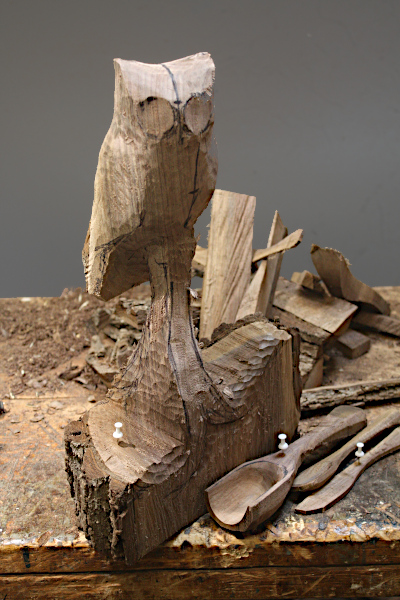
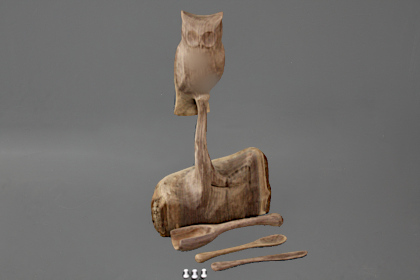
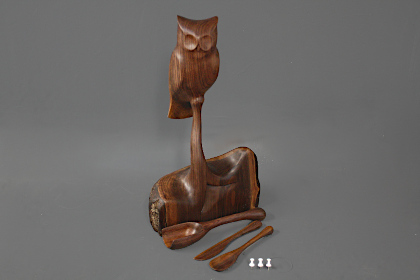
Above, the final shaping and sanding is nearly complete, while to the left, the cut off pieces sit in a melancholy pile because they didn't make the cut to be bona fide woodcarvings. The fact that they will soon be burned in a wood stove isn't too cheery either. I did some relief work at the base of the stem to suggest roots, undercutting to ensure that the lines are obvious even after the piece darkens with finishing. And below left, the four carvings from the white section are pictured, all guidelines removed and sanding complete. To the right, the same pieces with their final look, following the finishing procedure I described elsewhere. |
|
|
|
|
|