|
|

|
|
|
|
|
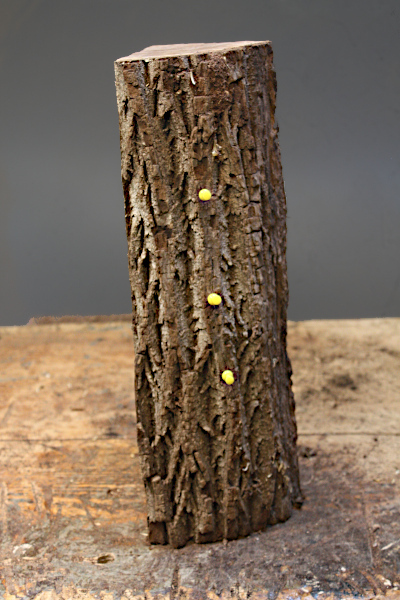
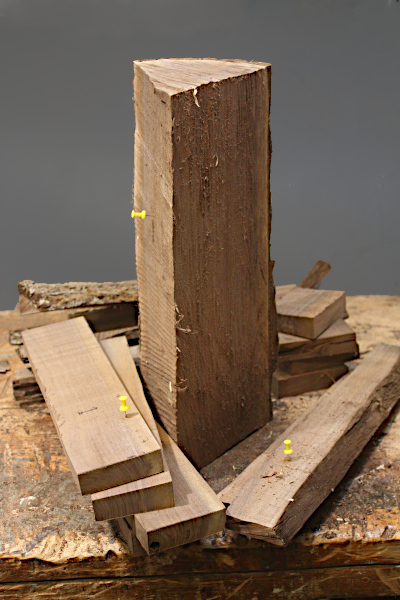
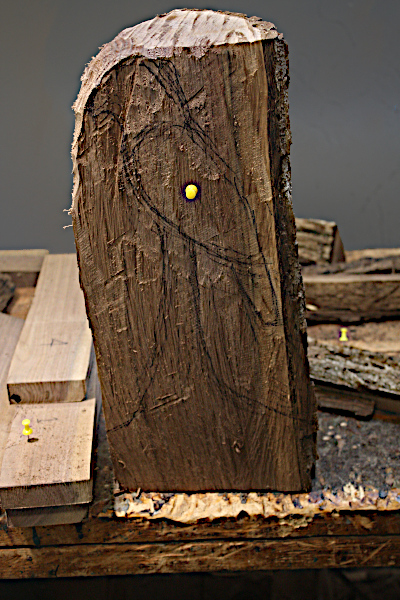
This section of the log had a deep crack up the middle, but nice looking wood otherwise, so I cut it in half along the crack and dealt with the two halves separately. I picked one half for a hawk, which I had planned on making, and the other half I cut along the grain into small boards to make a wall piece. I hadn't really planned on a wall piece, but the color and the grain of the boards were so nice, the idea came to me. |
|
|
|
|
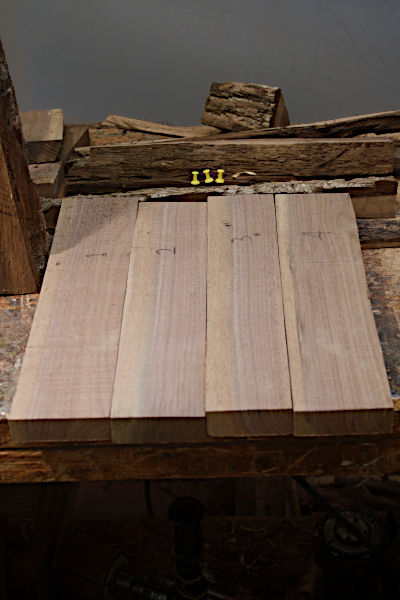
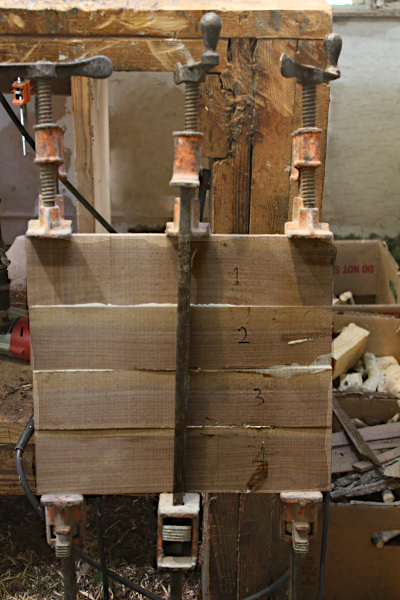
I was able to cut five boards, four of which I selected to make into a panel for the wall piece and with the fifth, I decided to make spoons - what a surprise. In the bottom left photo, I've arranged the boards such that the sapwood is to the left on each one to create a repeating pattern of different shades of brown. Then I numbered them to keep the arrangement until the panel was glued up. |
|
|
|
|
The other half of the
yellow section was narrow enough that I skipped the blocking out of the hawk
from the frontal direction and started with the side view. I do these drawings
on a larger scale then I plan for the final carving to be. That allows for some
wiggle room with the final details or if a problem should arise. You can always
take more wood off, but you can't put more on.
While staying with about the same level of
detail, I wanted to carve the hawk in a different style than the owl. While the owl
is of a more organic design with curved lines, implied motion, irregular shapes,
and even the use of the tree bark, I decided to go with a more hard, modernistic design
with sharp lines and angular, symmetrical shapes. While my personal taste is more toward organic
design, I enjoy carving both styles.
|
|
|
|
|
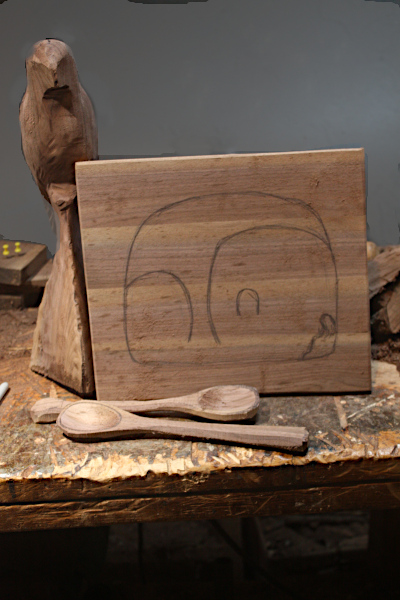
Meanwhile, I glued up the walnut boards into a panel, trimmed it up, and sanded it flat. On the surface I drew a variation of an idea I used in the past titled Caverns, depicting a human figure sitting alone in some sort of cave system for some unknown reason. In front of that are two spoons I cut from the fifth board Behind the panel the roughed out hawk is lurking. I seem to have skipped a few photos here with the hawk, but the steps taken up to this point are the same as for the owl except a little simpler because of sharper, easier to cut angles, more symmetrical shapes, and no head turn. |
|
|
|
|
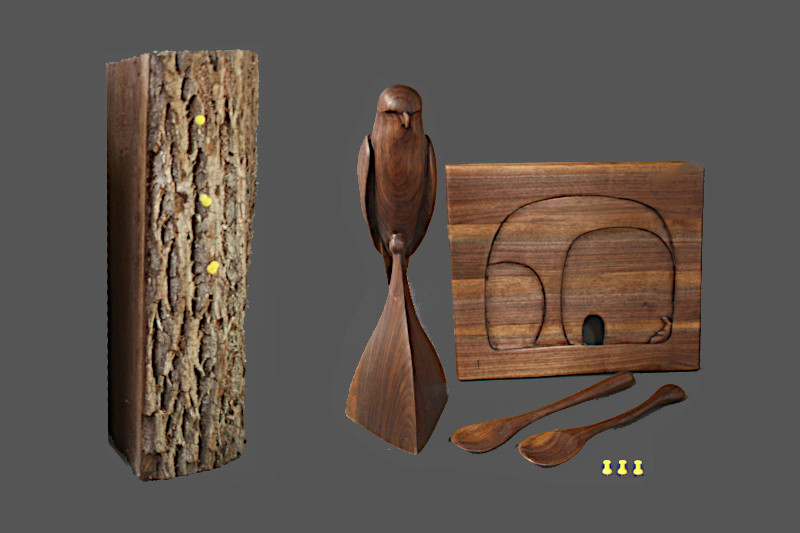
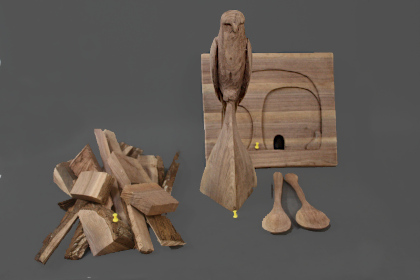
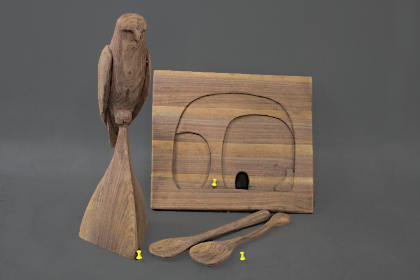
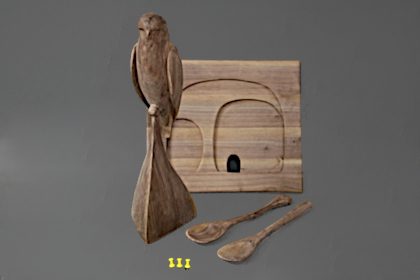
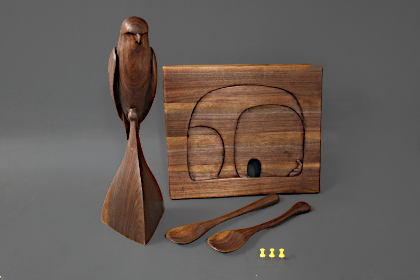
Above are the four pieces from the yellow section nearing completion and another pile of cut offs. The carving of Caverns is mostly relief carving, that is a raised design created by carving into a flat surface, leaving the background intact, and a slight example of pierced design. The small archway at the bottom center of the piece is cut completely through the panel to create a hole, which depending on what sort of wall color it is hung against could represent the entrance to the caverns with a bright color or with a dark color, the passage to another, deeper area. The hawk needs it's beak sharpened up and talons trimmed down a little before the final sanding. At the bottom left the four carvings are pictured after the final sanding and beside them, the same pieces, following the finishing procedure I described elsewhere. Note the pattern that resulted with the arrangement of the boards for Caverns. The sapwood is the lighter band at the top of each board and is also evident on the bowls of the spoons as well as the base of the hawk carving. |
|
|
|
|
|