|
|

|
|
|
|
|
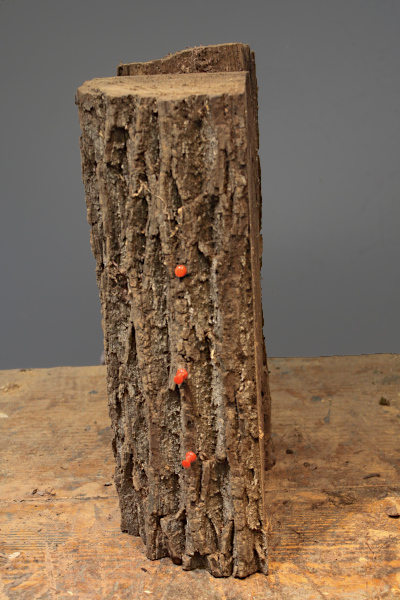
The cleanest pieces of a log, that is wood with no knots, cracks or blemishes, I typically tag for bowls. While I can work around such issues with most other carvings, bowls because of their function require a nice solid piece of wood all the way around. I remove the bark and check out the wood carefully before I cut it. The first step was to remove the cracks from the top of the piece, the end of the log that was exposed to air while it dried. The first cut was made just above the top push pin, and then two more cross sections were taken off because one crack ran deeper than expected. |
|
|
|
|
Bowls are a risky venture because no matter how good the piece of wood looks from the outside, you never know for certain what's on the inside, and it has to be perfect, inside and out. The risky part is that you won't find out until a lot of wood is removed and you commit the piece of wood to being a bowl as soon as you dig in a little. It doesn't happen often, but sometimes a hidden knot will be uncovered right at the bottom of the bowl and there isn't enough wood left on either side to dig it out. So from an otherwise nice piece of wood, that could have been used to carve something else, you might get a few small spoons but mostly kindling. |
|
|
|

|
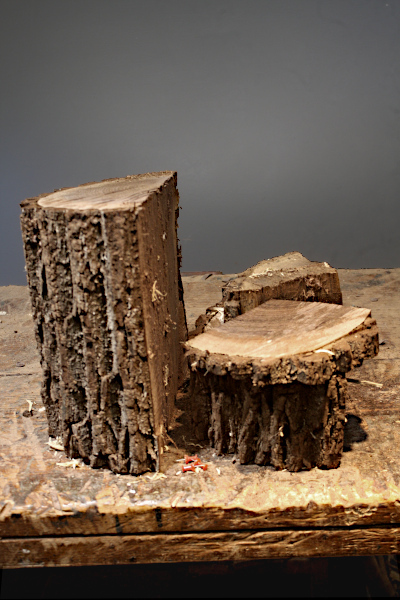
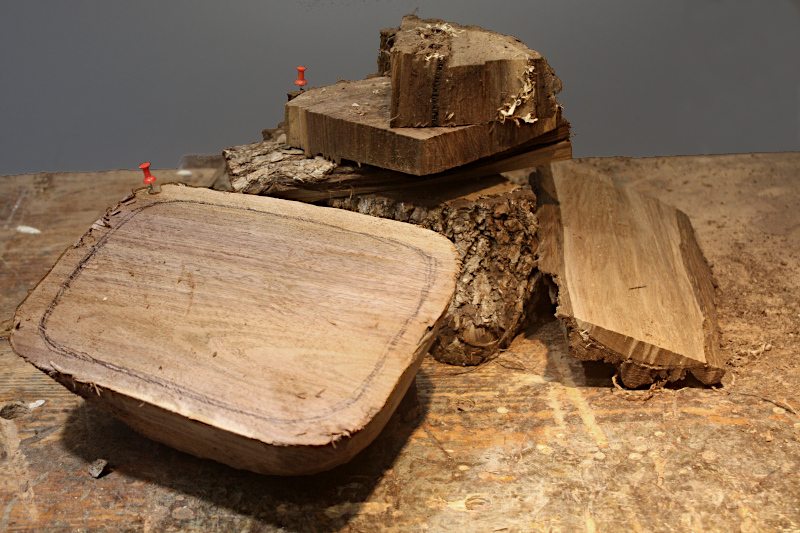
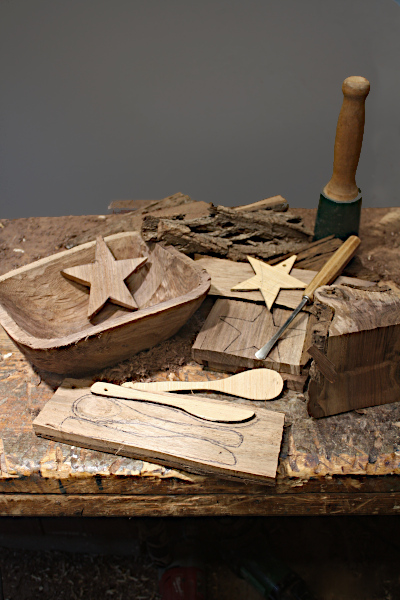
That being said, this piece of wood worked out well for a bowl with nice figuring and no flaws. The early cuts were made with an electric chain saw and the shaping of the exterior was done with a handheld grinder, resulting in the bowl-shaped piece of wood in the above right image. The same tool was used to remove the inside wood to form the rough bowl in the next image. After cutting the bowl from the red section, there weren't any cut-off pieces large enough for even a good sized spoon, so I had to go small. |
|
|
|
|
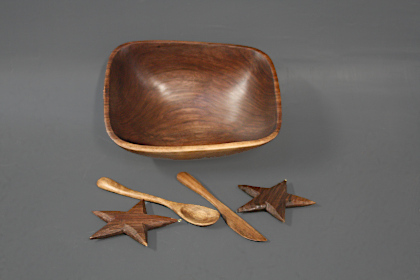
I cut a small spoon and spreader from the slab that came from the bottom of the bowl, and two star ornaments from a chunk of wood that came from the cracked area above where the bowl was cut out. Little items like this are quick and easy and I have used them as filler carvings for decades, ever since I started cutting from whole logs. I try to use as much of the log as I can, but there are so many nice pieces of wood that get cut off that I have to choose some of the best and move on. |
|
|
|
|
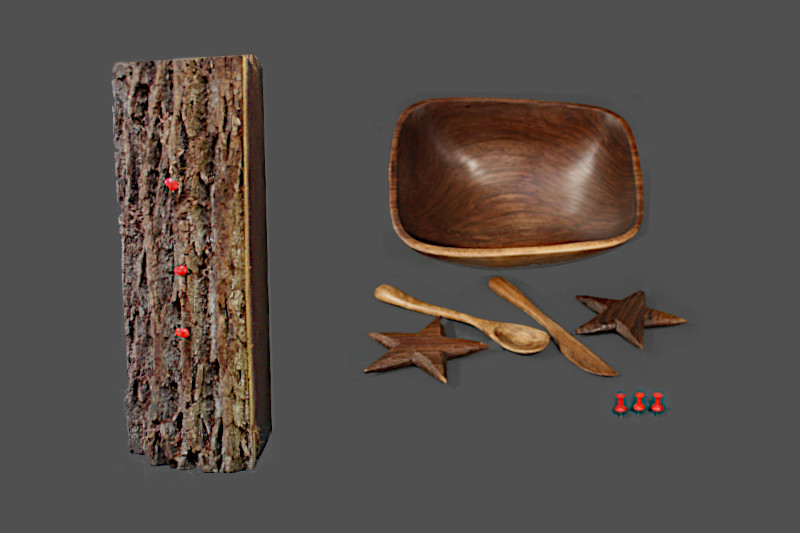
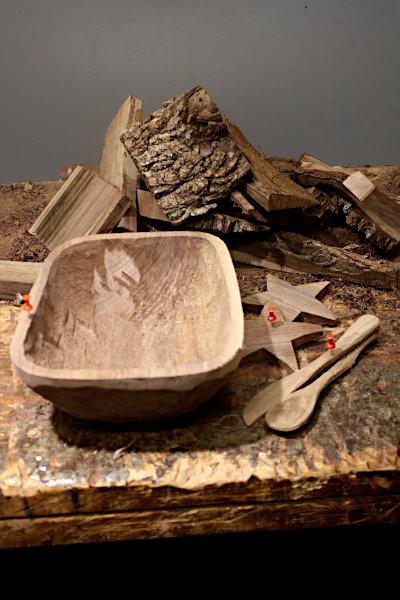
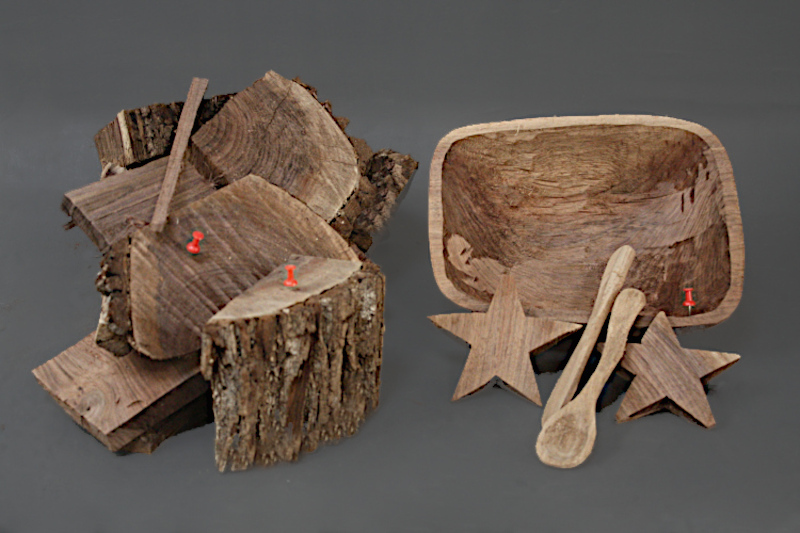
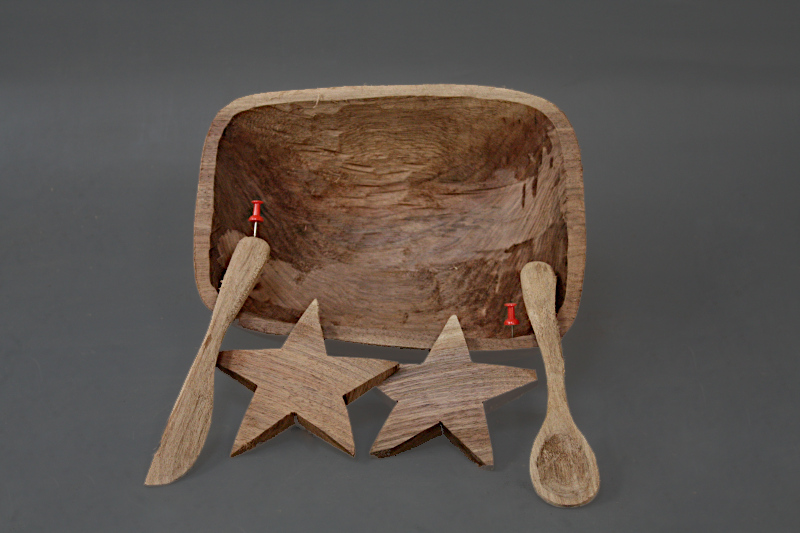
Above are the five carvings that came from the red section, including the portions that weren't used for a carving. They require a bit more shaping, then sanding, and the unused pieces are destined for the wood stove. At the bottom left the five carvings are pictured after the final sanding, and beside them, are pictured the same pieces, with the the characteristic look of finished black walnut, following the finishing procedure I described elsewhere. |
|
|
|

|
|